18 June 2009

7 Tips for Great Photos in the Dark

Follow these seven helpful tips to improve your night photographs.

Shoot During Dusk


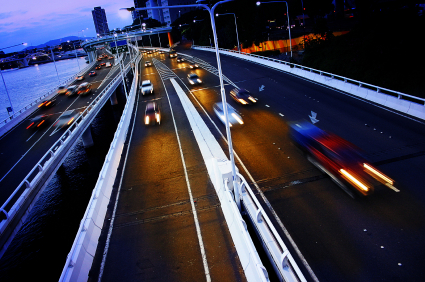
Some of the best night photos are taken during dusk; when the sky isn't completely black. Taking pictures during dusk will show more colors and details in the distance and will let you use a faster shutter speed.

Use High ISO


Use a high ISO if required. It is better to get recognizable photos of your friends that are grainy than blurry photos. You can reduce noise with image editing software but you can't remove blur.

Keep it Steady
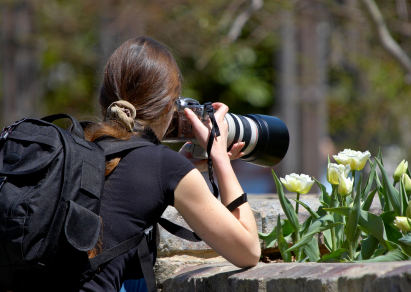


Taking photos at night requires slow shutter speed. To shoot bright pictures without the blur at night, use a tripod or monopod to keep your camera steady.

In addition to using a tripod or monopod, enable your cameras mirror lockup setting and gently press the shutter. If your camera doesn't have mirror lockup, you can use the self timer mode instead.

If you don't have a tripod or monopod with you, find some support objects to keep your body and arms stable. For example, you can lean on a wall or place your elbows on a table to keep your arms steady. If there's nothing to help keep you steady, stand with your legs far apart from each other and hold your breath while taking the picture.

Motion Blurs
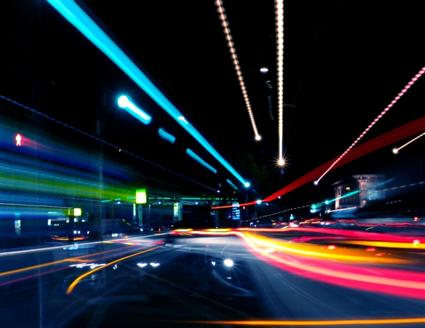


Not all blurs are bad. Some blurs such as motion blur can add interest. Try shooting photos of moving objects, or deliberatly move your camera to create a motion blur. Zooming in while the shutter is still open will also add an interesting forward-motion effect.

Freeze your Friends
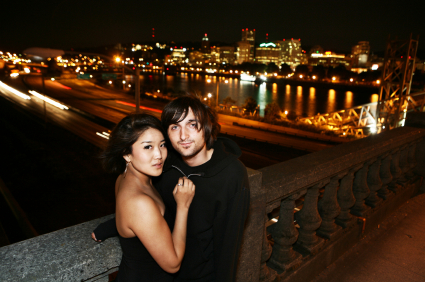


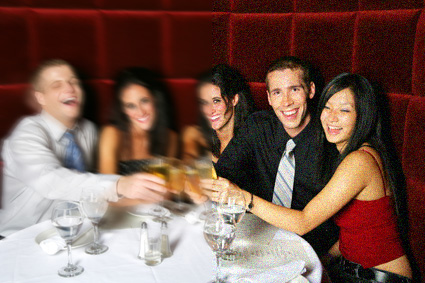
When taking photos of your friends at night, combine flash with a long exposure. The flash will freeze the foreground and the long exposure will reveal the background. Because people tend to move right after they see the flash, set the shutter curtain sync to the second curtain (Usually in the custom functions settings). This will fire a flash just before the shutter closes instead of in the beginning. Using second curtain sync will also put your friends in front of any motion blur so nothing is covering their faces. Second curtain sync is available in most new digital SLR cameras but rarely seen in point and shoot cameras.

Shoot for High Dynamic Range (HDR)
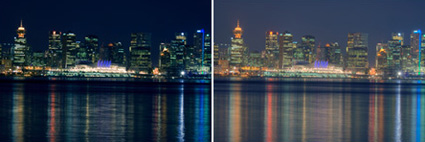


Place your camera on a tripod and shoot three exposures: one darker, one lighter, and one just in the middle. Your camera may have auto exposure bracketing to help you with this. Load the images into Photoshop and create HDR file out of the three exposures. Now you have a HDR image that you can apply tone mapping to to reveal more details. Tone mapped night photos can give results similar to shooting during twilight with more post-processing control.

Shoot Several and Stack
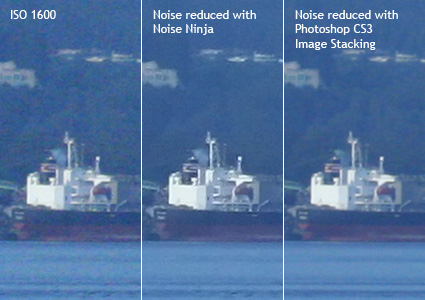


Sometimes when you shoot long exposures, noise and hot pixels will appear even at the lowest ISO setting. To overcome this problem, shoot the same photo a few times (more is better), and use Photoshop CS3 image stacking to combine the analyze the image to remove noise and hot pixels.

Start Photoshop CS3.
Open the File> Scripts menu and choose Load files into Stack
Click the Browse button and load all the images.
Checkmark the "Create Smart Object after Loading Layers" and click OK.
Open the Layers> Smart Objects> Stack Mode menu and choose Median.
8 Tips for Shooting Landscapes with Horizons

Improve your landscape photography skills with these must-know tips for breathtaking landscape photos.

1. Shoot about 30 minutes before and after sunset.
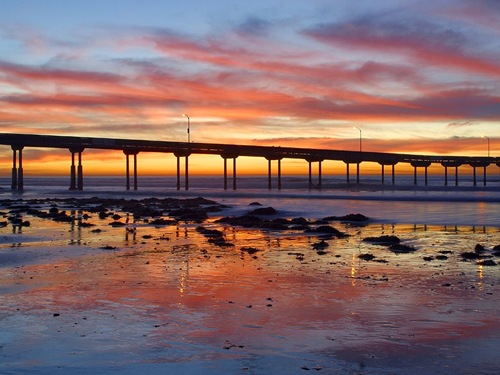
A sunset is a great thing to capture, but even if you’re not shooting the sunset but instead shooting at a 90-degree angle to the sunset or even shooting with the sunset at your back, having that subtle light brings out the colors in landscape photos. Most outdoor photography magazines won’t even consider shots that haven’t been shot around this time, as well as before/after sunrise.

2. Shoot about 30 minutes before and after sunrise.
As well as before and after sunset, shooting before and after sunrise causes a lot of detail and tone to be seen. The lighting avoids being overexposed, which happens many times when shooting in the middle of the day with harsh light. For portraits, you can shoot in the shade for subtle light even during the middle of the day, but with landscapes, you can’t put the entire landscape into the shade. You have to rely on the weather for that. You can shoot a little longer after sunrise if there’s some slight cloud cover, but usually an hour or two after sunrise and it’s already really bright.


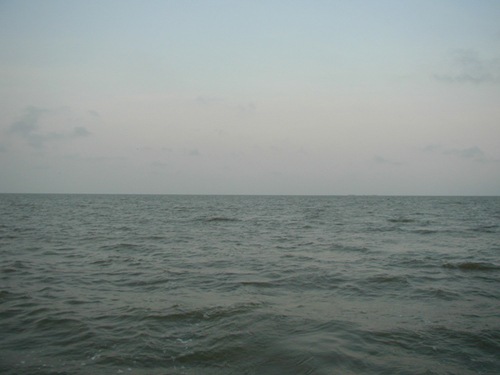
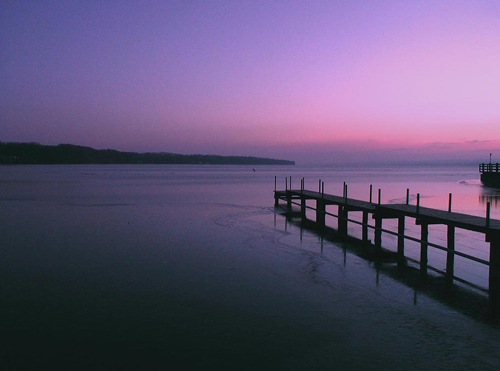
This is an example of a slightly underexposed landscape photo. It’s not shot during the right amount of light, and was shot when the sun was too far down or with too much cloud cover.
3. Have a foreground, middleground, and background.
This is part of the rule of thirds, which I cover in the next tip. Make sure you have three elements in landscape shot in order to make it more aesthetically pleasing. For example, if there are some seagulls running on the beach along the shore, that can be the foreground, while the middleground would be the waves crashing and part of the ocean, and the distant ocean and horizon would be the background.

4. Use the rule of thirds.
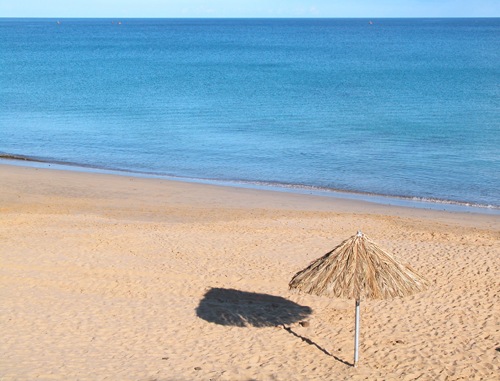
The rule of thirds applies to landscape photography as well. Imagine drawing out a tic-tac-toe design, with two lines running vertically and two horizontally. The plane is divided into three equal parts. Try to put the subject where these lines meet; for example, to top left or top right or bottom left or bottom right.

In this photo, the umbrella is in the lower right corner.

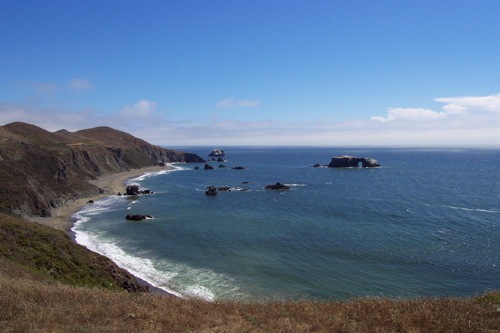
The angles and placement of the two objects near the upper left corner work well here.
5. Use a small aperture.
To include as much as the scenery possible, use a long depth of field. Using a more closed aperture makes the depth of field longer (and the f-stop setting a higher number). This allows for more things to be in focus. While blurring out the background is sometimes preferred, with landscape photos, we often want to have many elements in focus.

In this photo, the camera focuses on the grass, but we want the depth of field to be high so we can see more of the landscape as well.


This is one example where we can see the detail of even elements far away.
6. Don’t put the horizon in the middle of the shot.
This tip is closely related to the rule of thirds tip: don’t put subjects (the subject being the horizon in this example) in the middle of the shot. While many beginning photographers may be inclined to divide the photo in half, having the horizon the top third, or even top fifth or top eighth, is much better, as is having the horizon in the bottom third, fifth, or eighth. This allows us to focus on either the sky or the ocean or earth so we have some kind of focus.


7. If the sun is harsh, shoot away from it to get blue skies.
Shooting close to where the sun is causes the areas to be blown out.

This example of the Chinese Theatre in Hollywood shows how areas are blown out when shooting to close to the sun.
8. Finally, keep the horizon level.
This one may seem obvious, and although there are times when the horizon may need to not be level to accommodate a better composition of a subject, keeping the horizon level when possible is good practice.

16 June 2009

Beautiful lighting FX effect in Photoshop


This tutorial will show you how to make a beautiful lighting effect on scatters by using Photoshop. Keep in mind that I only provide the basic guidelines to creating this type of effect. There are tons of possibilities if you spend time to play with the settings and keep your creativity wide open.

Step 1 – Create the Head
Open a new document, changed the current layer to “Background” layer and fill “Black.” Next, create a new layer, then you should select some brush you like, in this case I choose a kind of vector brush, which you could find in the attached file at the bottom of this tutorial.


Step 2 – Creating the Tail
Create another new layer (layer > new > layer), called it “Tail”.
Select the “Brush” tool and open the Brushes Panel (Window > Brushes). Now we will play around with its setting to achieve the set best effect. The final purpose is to create a set of randomized dots.
In this scope of article, I choose settings as below:
- Brush Tip Shape: (Hardness: 100%, Roundness: 100%, Spacing: 1%)
- Shape Dynamics: (Size Jitter: 100%, Minimum Diameter: 20%)
- Scatter: (Both Axes, Scatter: 1000%)


Step 3 – Create the colorful effect
Create another new layer, above the background layer, name it “Color Base”. This is just a simple step, you choose a soft brush, then fill like the picture below with any color you like.

Step 4 – Make selection
Now, select the “Head” layer firstly, then go to the menu Select->Load Selection. Then choose New Selection and press Ok.

Next step, you repeat the above step, but choose “Add to Selection” in the “Load Selection” dialog box instead.
Now, you have loaded the selection. With the “Color Base” layer active, you click on the “Add layer mask” button at the bottom of the layer panel. Then you will have the result like the demonstration below.

Step 5 – Add glow effect
You select “Head” layer then go to Layer > Layer Style > Outer Glow. You could play around with those settings such as size, spread, opacity… however remember to set “Blend Mode” to “Overlay,” and the color to “White.” Of course, everything could be changed even you go to the last steps. Next, you should do the exam progress on “Tail” layer.
To end of this step. Right click on the “Color Base” then choose “Apply Layer Mask”. Then, youwill go to Filter > Blur > Gaussian Blur. You should set the Radius between 4-6. In this case, I give it the value 5.

Step 6 – Make up the head
Create a new layer above the “Color Base” layer. Then, you choose the “Gradient” tool and use the “Foreground to Transparent” preset. Go into the “Gradient Editor” and click the foreground color slider and change its position to “25%.” Exit the editor, pick a color that pleases you (can be changed later) and make a “Radial Gradient” over the “Head” layer. You could move the layer to match up with the “Head” layer.

Now with that layer still active, go to Layer > Layer Style > Color Overlay. Change the color to “White” and blend mode to “Overlay.” Probably, there are hundreds of ways to customized this effect till this way, so I just remind you the point, keep your creative going, and spend time to try settings. For my case, I want to add some more colorful effect in this step, and I change some setting by press Ctrl + U to open Hue/Saturation dialog and give it the settings like below.

Step 7 – Add more scatters
Now, duplicate the “Head” layer and pick the smudge tool, then select a soft brush at around 50% strength. This step is not easy to do. must be patient to smudge the new copied layer along the picture, try to use another tool such as “Eraser” to have the best result.

Then, you duplicate the current layer. Right click on it, choose Blending Options, and set the “Blend mode” to “Dissolve”. You should notice the opacity during this step to adjust the appearances of the scatters around the main object. Again, the “Eraser” tool need to be used reasonably to get rid of scatters.

Step 9 – Adjust settings
Actually, it is hard to tell you exactly how I come to the final result as below. You should play around with opacity, fill settings, combine with eraser, smudge tools to finalize the art work.

I have included 2 set of vector brushed for you guys to play around with the full PSD version.
Download PSD here

Making of Fiery Planets Collision


This long tutorial will show how we can create a fiery collision between two planets by using some Adjusment Layers and Blending Options.

13 June 2009

GOOGLE SQUARED

Some information is easy to find. If you want to learn the rules of golf, you can search Google for [golf rules] and it will return a list of relevant web sites right at the top. But not all your information needs are that simple. Some questions can be more complex, requiring you to visit ten, perhaps twenty websites to research and collect what you need.

For instance, I'm a big fan of roller coasters. In the past I've used Google to search for information about roller coasters, such as which ones are the tallest, fastest, and have the most loops. Finding this information used to take multiple searches — I'd find roller coaster sizes on one website, heights on another, and speeds on a third. By manually comparing the sites, I could get the information I was looking for, but it took some time. With Google Squared, a new feature just released in Google Labs, I can find my roller coaster facts almost instantly.

Google Squared is an experimental search tool that collects facts from the web and presents them in an organized collection, similar to a spreadsheet. If you search for [roller coasters], Google Squared builds a square with rows for each of several specific roller coasters and columns for corresponding facts, such as image, height and maximum speed.

While gathering facts from across the Internet is relatively easy (albeit tedious) for humans to do, it's far more difficult for computers to do automatically. Google Squared is a first step towards solving that challenge. It essentially searches the web to find the types of facts you might be interested in, extracts them and presents them in a meaningful way.

This technology is by no means perfect. That's why we designed Google Squared to be conversational, enabling you to respond to the initial result and get a better answer. If there's another row or column you'd like to see, you can add it and Google Squared will automatically attempt to fetch and fill in the relevant facts for you. As you remove rows and columns you don't like, Google Squared will get a fresh idea of what you're interested in and suggest new rows and columns to add. See it in action in the video below:

If you click on any fact, you'll see the sources Google Squared gathered it from as well as a list of other possible values that you can investigate. So even if your square isn't perfect at the beginning, it's easy to work with Google Squared to get a better answer in no time. Once you've got a square you're happy with, you can save it and come back to it later.

To give Google Squared a whirl, try searching for [planets] or [romantic movies]. You can try out Google Squared now in Google Labs.

07 June 2009

Windows 7 To Launch In Time For Christmas

The next generation of Windows will be launched this autumn with a touch sensitive screen which could spell the end of the mouse.

Microsoft announced it will roll out Windows 7, which will take the place of the unpopular Windows Vista, from October 22.
The launch is months ahead of schedule and the operating system will be ready for Christmas buyers.
Nine out of ten of the world's computers run on Windows software.
Last year the software giant made about a third of its £60bn income from selling the operating system.
Windows Vista has been attacked for being too complicated and Microsoft bosses hope the new system will restore public confidence in the product.

Reviews of Windows 7 have praised its consumer-friendly features.
Users with touch-sensitive screens will be able to control their computers with the touch of a finger, rather than with a keyboard and mouse.
The device, as popularised on the iPhone and iPod Touch by Apple, is a direct challenge to Microsoft's arch-rival.
Microsoft is battling against a growing market in netbooks - smaller PCs ideal for surfing online and emailing.
One of the leading manufacturers, Acer, has become the first to announce a line of small PCs to run Google's new Android operating system.
Free upgrades to the new system will be offered to computer buyers shortly ahead of the launch.
Microsoft said: "We’ve produced the best Windows operating system ever, designed according to how people want to use it.
"The primary focus throughout the development of Windows 7 has been quality."

Bing! Microsoft To Take On Google Search

Microsoft has begun the UK roll-out of Bing, the search engine it hopes can rival Google.


It replaces their existing Live Search and aims to offer more "intuitive" answers to questions.
Bing officially launches in the UK on Wednesday but a beta version is already live.
It will remain in beta for six to nine months in the UK as more features are added. The US version launched last week.
Features include a more sophisticated video search, which offers previews of the clips without having to leave the results page.
 

©2009 Edifying Minds | by TNB